Thursday, July 25, 2013

The sewing desk

This will be the first of several posts on putting my guest/craft room together. For the past two years it's been a sort of junk room where I throw everything that I don't want to be seen and then rush to put together when we have overnight guests. My current goal is to make it at the very least usable, but hopefully beautiful and "me" at the same time.  I'm learning about myself a little as I go along. My husband said I could do whatever I wanted in that particular room but then I did nothing all this time! I still ask his opinion here and there because he has such good taste though.

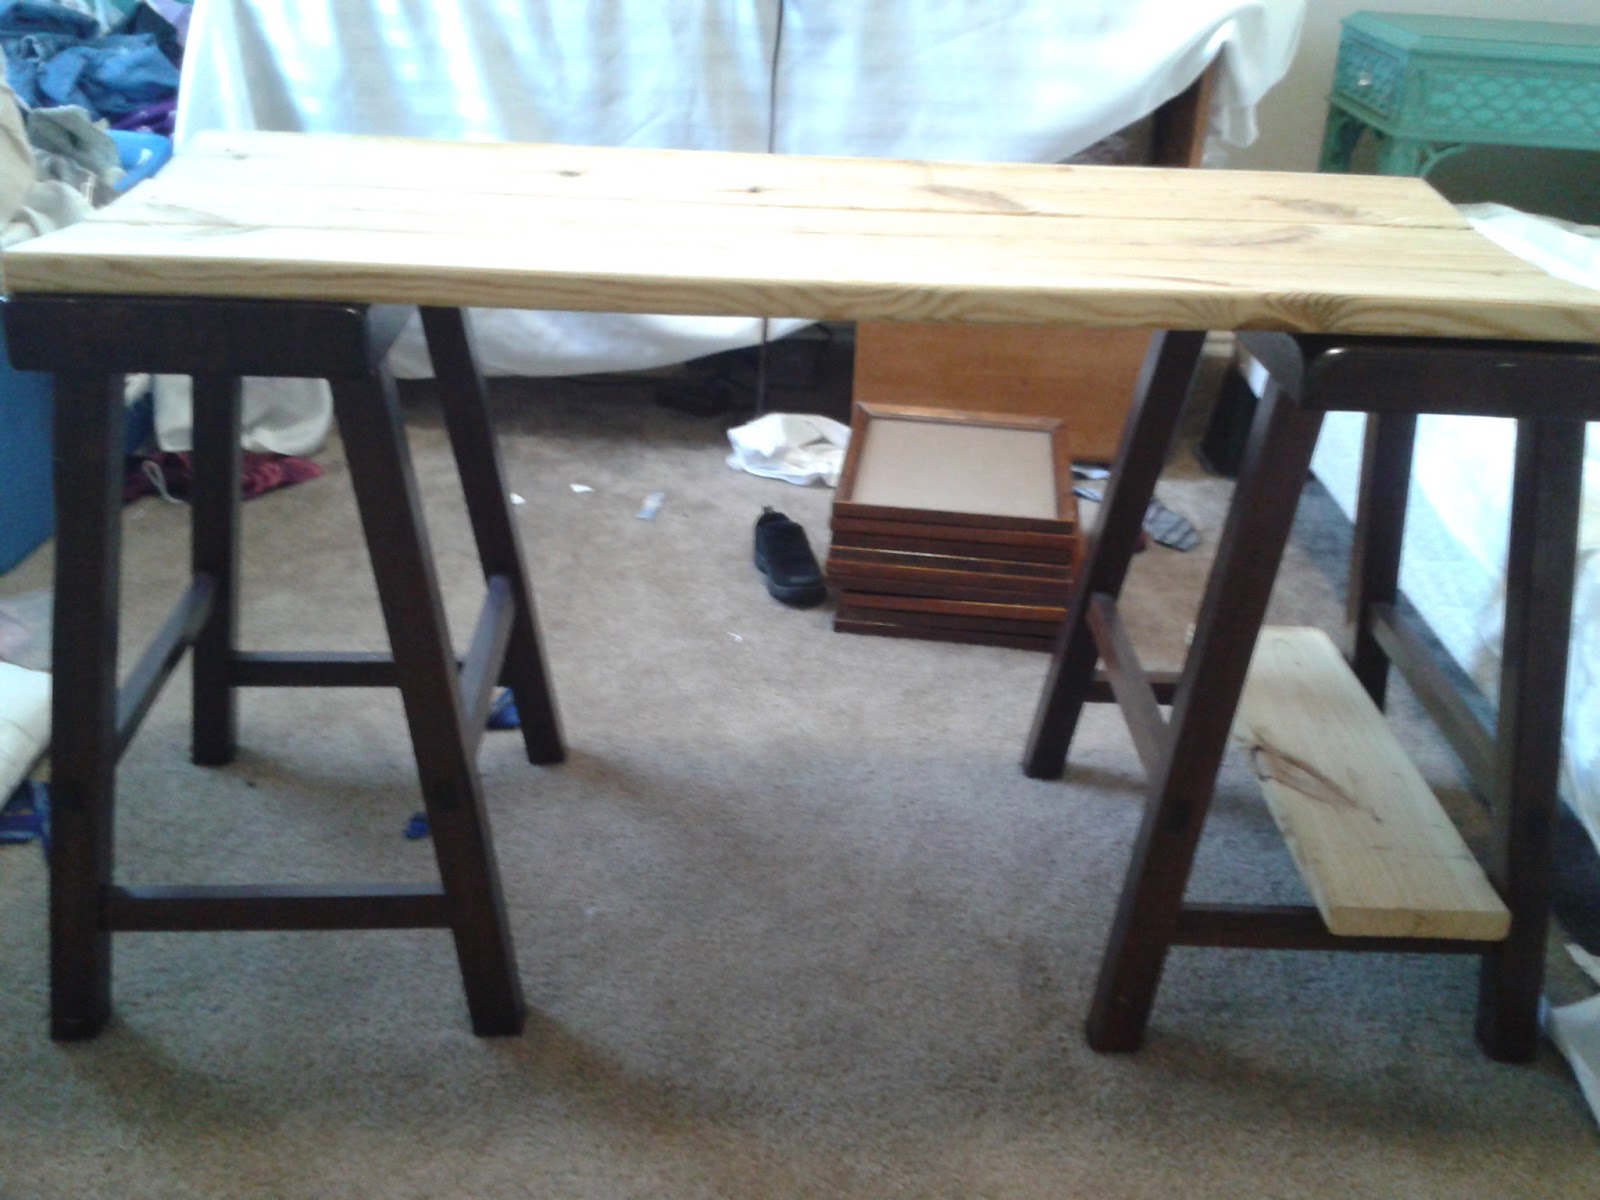
I've been wanting a little sewing desk for a while, so I decided to make one. I spent $27 and got a set of bar stools from craigslist and some wood from Lowes. The barstools still had $30.00 stickers on each! Here's the idea:
That's as close to a before picture as you are getting of the room by the way.

In progress, plus a mirror I was painting for the room. I'll show you that one next time. :)
And here she is! 

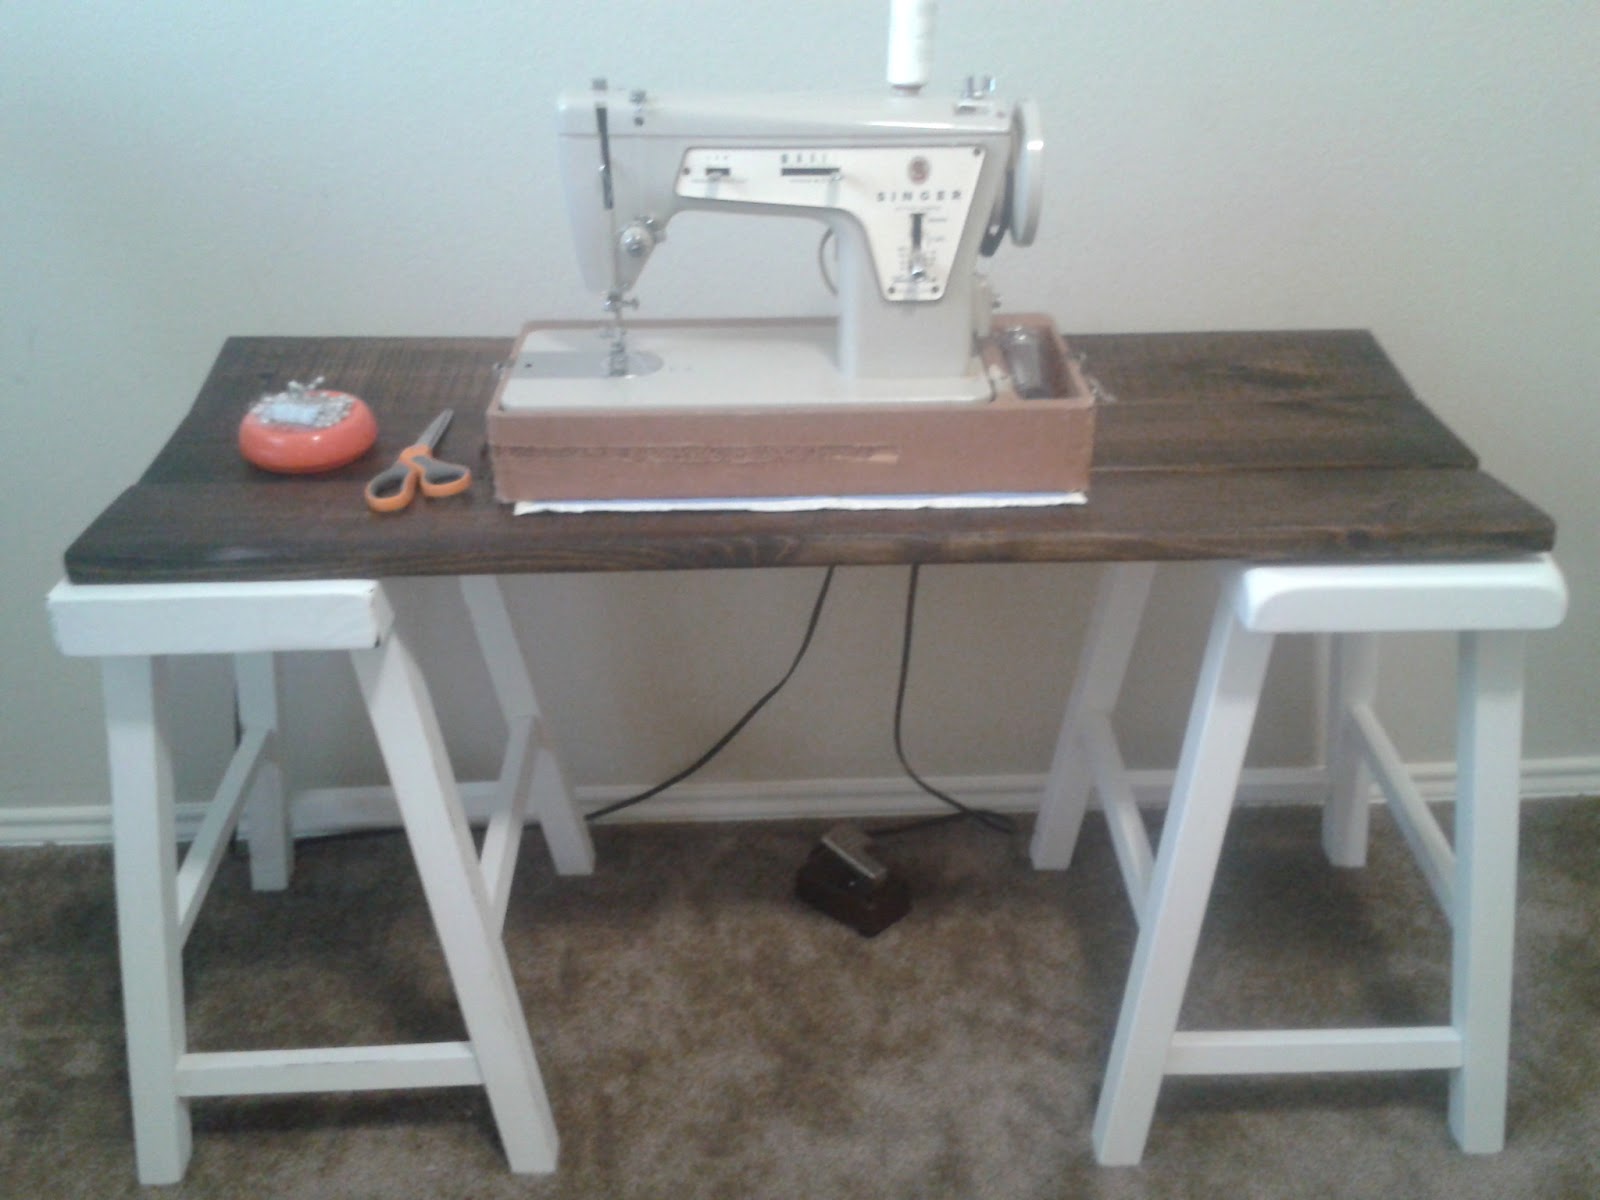
 Yes, I do sew on an ancient singer sewing machine. Yes it works, and no it never gives me any trouble at all!
 
 There we go, my cute little desk! I still need to do a little waxing and sanding, but I had to put it together to see how it would look! And the three little munchkins needed me...

Now I need your help. I have this chair. It needs some some tlc.

Do I cover the seat with this and refinish the wood?


Or do I cover it with a navy linen fabric and paint the chair white? I can't decide! Comment and let me know what you think. 

I'm not sure why the pictures are so cloudy, but I don't have time for perfection today so just pretend it was a foggy day or something like that!

linking up with http://www.lilyfieldlife.com/

Wednesday, July 17, 2013

a little change

I like changing things around the house. I've been fiddling around with the top of the piano for a while and I think I've finally got it. For now...

 We hung our family picture way too high and then were too lazy to fix it. It drove me crazy. I had a big, heavy, old mirror sitting in the garage for ages so I took it apart and put it's frame to good use. At first I thought I wanted it white like this.

 But instead I did this! Usually if I'm decorating or painting something on impulse, it includes bright colors. The turquoise color is the same as one of the walls in our living room and it really brought everything together. 


 I left it for a while but then I decided I needed to spray paint the vases. Why? Well, because the paint in the garage wouldn't stop calling my name of course. :) I still wanted something white in the group so I painted a wooden tray that was actually my three year old's playdough container. Then I added a leftover scrap of fabric from my kitchen chairs to the inside. I think it's a pretty nice  tray for a few little bits that almost became trash! I wish I had taken a before picture, but you will just have to imagine it plain and unfinished.


There now I think I will leave the poor thing alone for a while.

My baby


Meet Adele. She makes mud cute.
 My husband didn't quite "get" it when I showed him these pictures. I think he just couldn't get over her eating dirt while playing with her big brothers. But look at those eyes! She's a doll, a messy doll, but still a doll. :)
We have since had several lessons on not eating dirt so now she just tries to eat grass and flowers instead. It's a step...

Thursday, July 11, 2013

a before and after

So, after a great vacation, normal life, and three sick kids later I'm back. Oh, and I got a camera! Hopefully the photos will be looking a little better from here on out! Now for that before and after....

I got this little side/end table from a neighbor's yard sale. It was pretty beat up, but I knew I could make it pretty! 


  Ew right? 


And the after!


 Pretty right? ;) I love the little knob I got at Hobby Lobby!


 I sanded the top, cleaned it all up, and then painted her with homemade chalk paint. But she was missing something. I distressed it, but that wasn't good enough. After experimenting a bit I used wood stain on top of the paint to show off all the nice details. Perfect!


 The picture below shows the true color.


 And a few more pictures just for fun.


What do you think? Was it worth the hours of work? I think so. :)


I'm linking up with
http://www.lilyfieldlife.com/2013/07/paint-parade-4-furniture-link-party-and.html